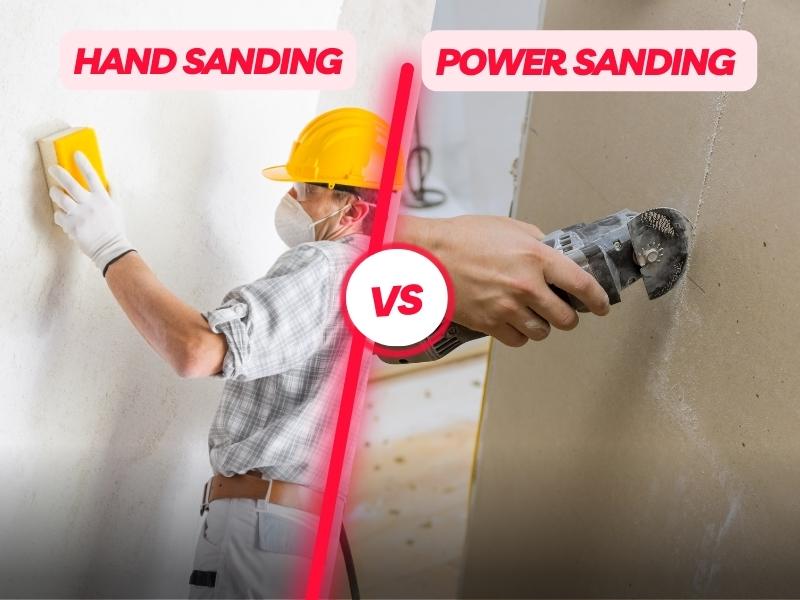
When it comes to sanding drywall, there are two main methods:
- Hand Sanding
- Power Sanding
Both have their own advantages and disadvantages, and it can be difficult to decide which one is best for the job. In this blog post, we will take a look at the pros and cons of both Hand Sanding and Power Sanding, so that you can determine which method is right for your project.
Difference Between Hand Sanding VS Power Sanding Drywall:
Hand sanding vs power sanding drywall are two different ways to achieve a smooth, even finish. Hand sanding drywall is the traditional method for smoothing out the surface of the drywall. It requires the use of a sanding block, which is a small block of wood with sandpaper attached to it. The sandpaper should be coarse enough to remove any bumps and ridges on the surface, but fine enough to not leave any scratches. It is labor intensive, as it requires you to manually run the sandpaper over the drywall surface.
Power sanding drywall, on the other hand, is a much more efficient method. Instead of manually sanding the drywall, you can use a power sander that is attached to a vacuum. It uses an electric sander, which is a tool with a head that rotates to quickly sand the drywall surface.
Comparison of Hand Sanding VS Power Sanding Drywall:
-
Costs:
When it comes to sanding, the cost of the job depends largely on the type of equipment used. Hand sanding is much more affordable than power sanding, as power sanding requires specialized equipment and the cost of that equipment can be quite expensive. Hand sanding tools, such as sandpaper and sanding blocks, are relatively inexpensive and can be reused multiple times, making them a cost-effective option for smaller sanding jobs.
-
Time:
Power sanders can quickly and efficiently sand large surfaces in a fraction of the time it takes to hand sand. Hand sanding requires more time and effort than power sanding, as the process is done manually. If time is of the essence, power sanding is definitely the way to go.
-
Effectiveness:
When it comes to effectiveness, both hand sanding and power sanding can get the job done. If you need to sand large areas, a power sander will be much faster and more efficient. In contrast, if you need to sand in tight corners or delicate details, hand sanding will be your best bet.
-
Level of Control:
When it comes to sanding wood, both hand sanding and power sanding offer a level of control that is dependent on the user. With hand sanding, the user has complete control over the pressure applied, the direction of movement, and the overall speed. This allows for greater precision and accuracy when it comes to achieving an even, consistent finish. Power sanding, on the other hand, provides greater speed and power compared to hand sanding but with less control. Power sanders require far less effort to use than hand sanders, but the user may not have as much control over the pressure applied and the direction of movement.
Advantages of Hand Sanding:
- The primary advantage of this type of sanding is its ability to reach small areas that machines cannot.
- Hand sanding also gives the user more control over the sanding process, allowing them to tailor it to the specific needs of the project.
- Hand sanding requires minimal setup time and can be performed anywhere. This makes it a great choice for quick jobs or for on-site work.
- Hand sanders are relatively inexpensive, and the materials required for the job can be found in any home improvement store. This makes hand sanding an attractive option for those on a limited budget.
- Many people appreciate the more tactile experience of hand sanding, compared to the impersonal sensation of machine sanding. This can make the process more enjoyable, especially for those who enjoy working with their hands.
Disadvantages of Hand Sanding:
- The primary disadvantage of hand sanding is the amount of time and effort it can take. Hand sanding is a slow process and can be very tiring if done for a long period of time. Depending on the size and complexity of the project, hand sanding can take several hours or even days to complete.
- Another disadvantage is the potential for inconsistent results. Hand sanding can be very difficult to master, and it is easy to miss some spots or create dips or waves on the surface.
- It can also be difficult to get an even finish with hand sanding, and it can be challenging to hold the sandpaper in place while sanding.
Advantages of Power Sanding:
- The major advantage of power sanding is that it significantly reduces the amount of time and effort it takes to get a smooth finish. Power sanders are typically faster and more effective than manual sanding. This means that you can get a perfect finish on your project quickly and easily, saving you time and energy.
- Power sanders also have a variety of attachments, allowing you to use them for a variety of sanding and polishing applications. The different attachments make it possible to do tasks such as smoothing furniture with intricate detailing and achieving a perfect finish on wood floors.
- Another great advantage of power sanding is its ability to reduce mess. Power sanders are designed to collect dust as you sand, so you won’t have to worry about a big mess afterwards. This makes it easier to keep the sanding area clean, helping you achieve a better result.
Disadvantages of Power Sanding:
- One of the major disadvantages of power sanding is the cost. Power sanders are more expensive than manual sanders, and you’ll need to buy the right attachments for each job. Power sanders can be quite loud, so you may need to invest in ear protection if you’re sanding inside.
- Power sanders also require a certain level of skill to use effectively. They can be powerful tools, and it’s easy to accidentally damage the surface you’re working on if you’re not careful. This means that it’s important to take the time to practice with your power sander before you start working on a project.
- Power sanders can be difficult to control. This means that you may need to spend some time perfecting your technique before achieving the perfect finish.
Hand Sanding VS Power Sanding Drywall, Determining the Best Option for Your Project:
When choosing between hand sanding vs power sanding drywall, there are several important factors to consider. The main ones are the size of the area being sanded, the amount of time available, and the desired finish.
1. Size of the Area:
If the area is large and you don’t have a lot of time to devote to the project, then power sanding is likely the best option. It is much faster than hand sanding and will save you a lot of time. Plus, with a power sander, you can cover a larger area at once.
2. Time Available:
If you don’t have a lot of time to devote to the job, then power sanding is the way to go. It is much faster than hand sanding and will save you a lot of time. On the other hand, if you have plenty of time and don’t mind taking your time with the job, then hand sanding may be the best option.
3. Your Budget:
Your budget is also an important factor to consider. Power sanders tend to be more expensive than hand sanders, so if you’re on a tight budget, hand sanding may be the better option.
4. Your Skill Level:
Depending on your skill level, one technique may be better suited than the other. If you are new to sanding drywall, hand sanding may be the best option as it is easier to control. On the other hand, if you are experienced, power sanding may be the more efficient option.
Ultimately, the choice between hand-sanding and power-sanding depends on the needs of your project. Consider the factors above, and make the decision that best fits your requirements.
Step By Step Guide for Hand Sanding Drywall:

If you decide to go with hand sanding for drywall, here’s a step-by-step guide for getting the job done:
- Start by gathering the necessary materials:
- A sanding block.
- 120-grit sandpaper.
- A dust mask.
Make sure to wear the dust mask to avoid breathing in any drywall dust.
- Begin by using the sanding block to sand down any ridges or bumps in the wall. Start with light pressure and increase as necessary.
- When the ridges and bumps are gone, switch to the 120-grit sandpaper to begin sanding the wall. Focus on areas with excess joint compound and texture and use circular motions to work it all down.
- Once the excess joint compound and texture have been sanded, gently go over the entire wall to even out any remaining texture.
- When you’re done sanding, use a vacuum to remove all of the drywall dust from the room.
- Finally, use a damp cloth to wipe down the wall and remove any remaining dust.
And that’s it. With a little bit of patience and elbow grease, you can easily sand down your drywall and give it a fresh, new look.
Step By Step Guide for Power Sanding Drywall:
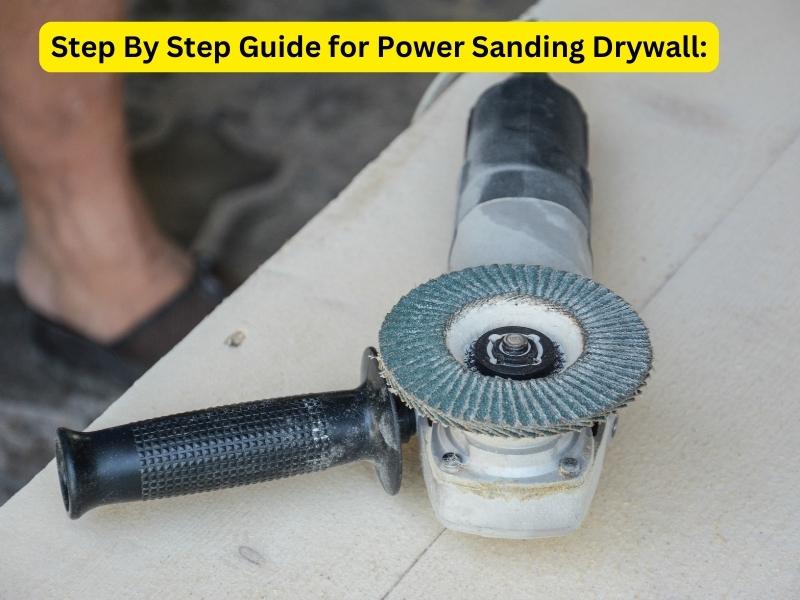
Here is a step-by-step guide if you decide to power sand your drywall.
1. Prepare the area: Before you start sanding, make sure the area you’ll be working on is clear of all debris, furniture, and other items. If the area is particularly dusty, consider wiping down the walls with a damp cloth to minimize the amount of dust created by the sanding.
2. Choose the right sandpaper: Choose a course grit sandpaper, such as 80-grit, for power sanding drywall. If you’re planning to use a power sander, you’ll also need to make sure you have the right attachment for your machine.
3. Begin sanding: Set your sander to a relatively low speed and begin sanding the area. Make sure to move the sander in straight and even lines, and to keep the sander level. When you come to a corner or other difficult-to-reach area, use a sanding sponge or a sanding block to sand these areas by hand.
4. Vacuum the area: Once you’re done sanding, use a vacuum to remove any remaining dust or debris.
5. Finish up: If you are finishing up with a primer and paint, you’ll want to make sure the wall is completely dry before you begin painting. You may also want to use a damp cloth to wipe away any remaining dust before you paint.
Now you are ready to begin painting or applying texture to the wall.
FAQs:
Q: How often should I sand?
A: This will depend on both the item you’re sanding and the amount of wear and tear it experiences. For example, if you’re sanding a piece of furniture that gets a lot of use, you’ll probably need to sand it more often than if you’re sanding a piece of trim that doesn’t see much wear and tear.
Q: What are the different types of sandpaper?
A: There are a variety of different types of sandpaper, each designed for a specific purpose. Coarser grits are typically used for heavy duty jobs like removing paint or varnish, while finer grits are better suited for delicate tasks like polishing wood. In between these two extremes, you’ll find a variety of grits that can be used for a variety of purposes.
Q: How do I know which grit to use?
A: The type of grit you use will depend on the project you’re working on. In general, though, finer grits are better for delicate tasks while coarser grits are better for heavy duty jobs.
Q: How do I dispose of sandpaper?
A: Once you’re done with your sandpaper, you can dispose of it in a few different ways. You can recycle it if the paper is made of recyclable material or compost it if the paper is biodegradable. You can also throw it away in the trash.
Q: What Safety precautions should I take when sanding?
A: Here are a few safety precautions to take when sanding.
- Make sure to wear goggles to protect your eyes.
- Be sure to keep children and pets away from the area while you’re sanding.
- Do not sand for extended periods of time. Take breaks to rest your hands and avoid fatigue.
- When sanding, it is important to take safety precautions to avoid inhaling dust particles which can be harmful to your health. To do this, you should wear a dust mask and make sure that the area you are working in is well ventilated.
- Be sure to clean up any dust that has accumulated when you are finished sanding. This can be done by vacuuming or wiping down the surface with a damp cloth.
With these safety precautions in mind, sanding can be a safe and easy way to improve the look of your project.